Image filtering allows you to apply various effects on photos. The type of image
filtering described here uses a 2D filter similar to the one included in Paint
Shop Pro as User Defined Filter and in Photoshop as Custom Filter.
Convolution
The trick of image filtering is that you have a 2D filter matrix, and the 2D
image. Then, for every pixel of the image, take the sum of products. Each
product is the color value of the current pixel or a neighbor of it, with the
corresponding value of the filter matrix. The center of the filter matrix has to
be multiplied with the current pixel, the other elements of the filter matrix
with corresponding neighbor pixels.
This operation where you take the sum of products of elements from two 2D
functions, where you let one of the two functions move over every element of the
other function, is called Convolution or Correlation. The difference between
Convolution and Correlation is that for Convolution you have to mirror the
filter matrix, but usually it's symmetrical anyway so there's no difference.
The filters with convolution are relatively simple. More complex filters, that
can use more fancy functions, exist as well, and can do much more complex things
(for example the Colored Pencil filter in Photoshop), but such filters aren't
discussed here.
The 2D convolution operation requires a 4-double loop, so it isn't extremely
fast, unless you use small filters. Here we'll usually be using 3x3 or 5x5
filters.
There are a few rules about the filter:
It's size has to be uneven, so that it has a center, for example 3x3,
5x5 and 7x7 are ok.
It doesn't have to, but the sum of all elements of the filter should be
1 if you want the resulting image to have the same brightness as the
original.
If the sum of the elements is larger than 1, the result will be a
brighter image, and if it's smaller than 1, a darker image. If the sum is 0,
the resulting image isn't necessarily completely black, but it'll be very
dark.
The image has finite dimensions, and if you're for example calculating a pixel
on the left side, there are no more pixels to the left of it while these are
required for the convolution. You can either use value 0 here, or wrap around to
the other side of the image. In this tutorial, the wrapping around is chosen
because it can easily be done with a modulo division.
The resulting pixel values after applying the filter can be negative or larger
than 255, if that happens you can truncate them so that values smaller than 0
are made 0 and values larger than 255 are set to 255. For negative values, you
can also take the absolute value instead.
In the Fourier Domain or Frequency Domain, the convolution operation becomes a
multiplication instead, which is faster. In the Fourier Domain, much more
powerful and bigger filters can be applied faster, especially if you use the
Fast Fourier Transform. More about this is in the Fourier Transform article. In
this article, we'll look at a few very typical small filters, such as blur, edge
detection and emboss.
Image filters aren't feasible for real time applications and games yet, but
they're useful in image processing.
Digital audio and electronic filters work with convolution as well, but in 1D.
Here's the code that'll be used to try out different filters. Apart from using a
filter matrix, it also has a multiplier factor and a bias. After applying the
filter, the factor will be multiplied with the result, and the bias added to it.
So if you have a filter with an element 0.25 in it, but the factor is set to 2,
all elements of the filter are in theory multiplied by two so that element 0.25
is actually 0.5. The bias can be used if you want to make the resulting image
brighter.
The result of one pixel is stored in floats red, green and blue, before
converting it to the integer value in the result buffer.
The filter calculation itself is a 4-double loop that has to go through every
pixel of the image, and then through every element of the filter matrix. The
location imageX and imageY is calculated so that for the center element of the
filter it'll be x, y, but for the other elements it'll be a pixel from the image
to the left, right, top or bottom of x, y. It's modulo divided through the width
(w) or height (h) of the image so that pixels outside the image will be wrapped
around. Before modulo dividing it, w or h are also added to it, because this
modulo division doesn't work correctly for negative values. Now, pixel (-1, -1)
will correctly become pixel (w-1, h-1).
#define filterWidth 3
#define filterHeight 3
#define imageWidth 320
#define imageHeight 240
//declare image buffers
ColorRGB image[imageWidth][imageHeight];
ColorRGB result[imageWidth][imageHeight];

double filter[filterWidth][filterHeight] =
{
     0, 0, 0,
     0, 1, 0,
     0, 0, 0
};

double factor = 1.0;
double bias = 0.0;

int main(int argc, char *argv[])
{
    //set up the screen
    screen(imageWidth, imageHeight, 0, "Filters");

    //load the image into the buffer
    loadBMP("pics/photo3.bmp", image[0], imageWidth , imageHeight);

    //apply the filter
    for(int x = 0; x < w; x++)
    for(int y = 0; y < h; y++)
    {
        double red = 0.0, green = 0.0, blue = 0.0;

        //multiply every value of the filter with corresponding image pixel
        for(int filterX = 0; filterX < filterWidth; filterX++)
        for(int filterY = 0; filterY < filterHeight; filterY++)
        {
            int imageX = (x - filterWidth / 2 + filterX + w) % w;
            int imageY = (y - filterHeight / 2 + filterY + h) % h;
            red += image[imageX][imageY].r * filter[filterX][filterY];
            green += image[imageX][imageY].g * filter[filterX][filterY];
            blue += image[imageX][imageY].b * filter[filterX][filterY];
        }

        //truncate values smaller than zero and larger than 255
        result[x][y].r = min(max(int(factor * red + bias), 0), 255);
        result[x][y].g = min(max(int(factor * green + bias), 0), 255);
        result[x][y].b = min(max(int(factor * blue + bias), 0), 255);
    }

    //draw the result buffer to the screen
    for(int x = 0; x < w; x++)
    for(int y = 0; y < h; y++)
    {
        pset(x, y, result[x][y]);
    }

    //redraw & sleep
    redraw();
    sleep();
}
If you want to take the absolute value of values smaller than zero instead of
truncating it, use this code instead:
//take absolute value and truncate to 255

        result[x][y].r = min(abs(int(factor * red + bias)), 255);
        result[x][y].g = min(abs(int(factor * green + bias)), 255);
        result[x][y].b = min(abs(int(factor * blue + bias)), 255);
The filter filled in currently,
[ 0 0 0 ]
[ 0 1 0 ]
[ 0 0 0 ],
does nothing more than returning the original image, since only the center value
is 1 so every pixel is multiplied with 1.
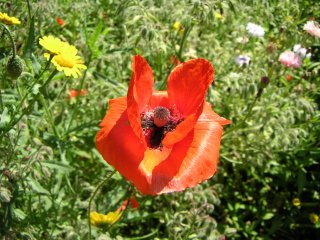
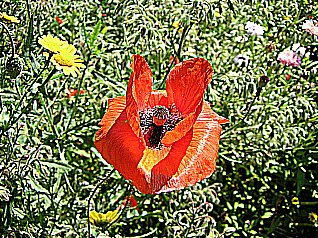
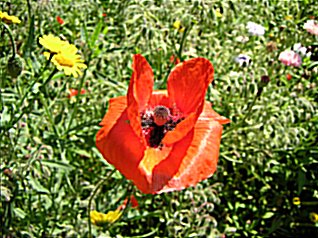
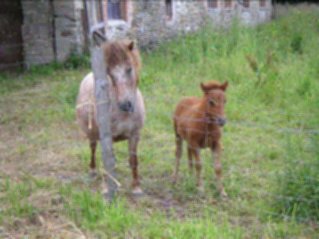
The code tries to load the image "pics/photo3.bmp".
The original image looks like this:
Now we'll apply several filters to the image by changing the definition of the
filter array and running the code.
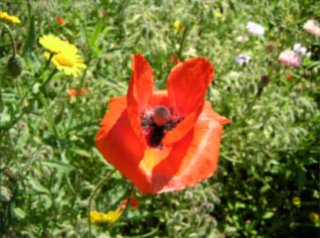
Blur
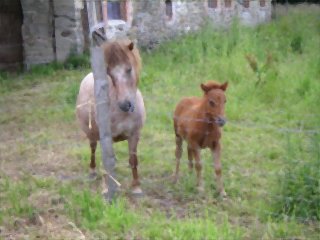
Blurring is done for example by taking the average of the current pixel and it's
4 neighbors. Take the sum of the current pixel and it's 4 neighbors, and divide
it through 5, or thus fill in 5 times the value 0.2 in the filter:
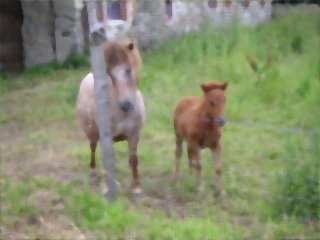
The sum of all elements of the filter should be 1, but instead of filling in
some floating point value inside the filter, instead the factor is divided
through the sum of all elements, which is 13.
This blurs it a bit more already:
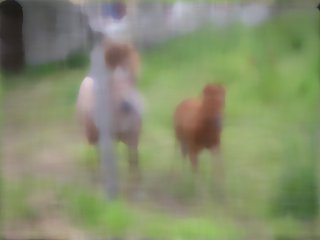
The more blur you want, the bigger the filter has to be, or you can apply the
same small blur filter multiple times.
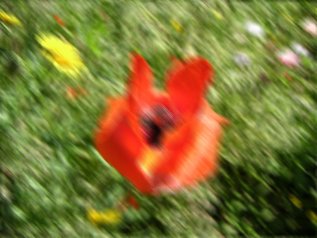
Motion Blur
Motion blur is achieved by blurring in only 1 direction. Here's a 9x9 motion
blur filter:
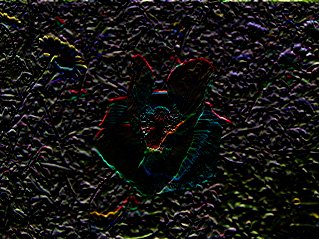
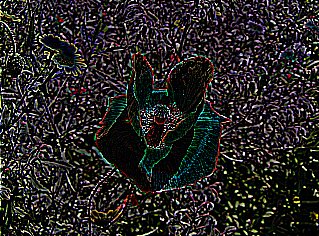
A filter of 5x5 instead of 3x3 was chosen, because the result of a 3x3 filter is
too dark on the current image. Note that the sum of all the elements is 0 now,
which will result in a very dark image where only the edges it detected are
colored.
The reason why this filter can find horizontal edges, is that the convolution
operation with this filter can be seen as a sort of discrete version of the
derivative: you take the current pixel and subtract the value of the previous
one from it, so you get a value that represents the difference between those two
or the slope of the function.
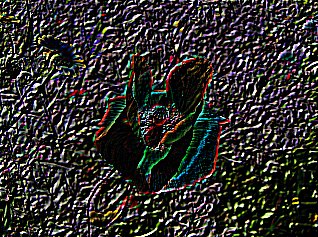
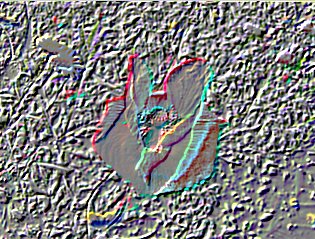
Here's a filter that'll find vertical edges instead, and uses both pixel values
below and above the current pixel:
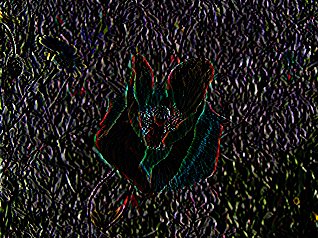
Here's yet another possible filter, one that's good at finding edges of 45�. The
values '-2' were chosen for no particular reason at all, just make sure the sum
of the values is 0.
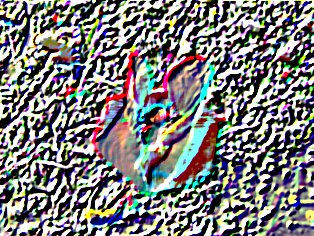
To sharpen the image is very similar to finding edges, add the original image,
and the image after the edge detection to each other, and the result will be a
new image where the edges are enhanced, making it look sharper. Adding those two
images is done by taking the edge detection filter from the previous example,
and incrementing the center value of it with 1. Now the sum of the filter
elements is 1 and the result will be an image with the same brightness as the
original, but sharper.
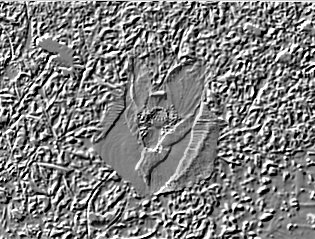
An emboss filter gives a 3D shadow effect to the image, the result is very
useful for a bumpmap of the image. It can be achieved by taking a pixel on one
side of the center, and subtracting one of the other side from it. Pixels can
get either a positive or a negative result. To use the negative pixels as shadow
and positive ones as light, for a bumpmap, a bias of 128 is added to the image.
Now, most parts of the image will be gray, and the sides will be either dark
gray/black or bright gray/white.
For example here's an emboss filter with an angle of 45�:
Both the Mean Filter and the Median Filter can be used to remove noise from an
image. A Mean Filter is a filter that takes the average of the current pixel and
it's neighbors, for example if you use it's 8 neighbors it becomes the filter
with kernel:
This is an ordinary blur filter. We can test it on the following image with so
called "Salt and Pepper" Noise:
When applied, it gives a blurry result:
The Median Filter does somewhat the same, but, instead of taking the mean or
average, it takes the median. The median is gotten by sorting all the values
from low to high, and then taking the value in the center. If there are two
values in the center, the average of these two is taken. A median filter gives
better results to remove salt and pepper noise, because it completely eliminates
the the noise. With an average filter, the color value of the noise particles
are still used in the average calculations, when taking the median you only keep
the color value of one or two healthy pixels. The median filter also reduces the
image quality however.
Such a median filter can't be done with a convolution, and a sorting algorithm
is needed, in this case combsort was chosen, which is a relatively fast sorting
algorithm.
To get the median of the current pixel and it's 8 neighbors, set filterWidth and
filterHeight to 3, but you can also make it higher to remove larger noise
particles.
Here are the variable declarations. The arrays red, green and blue will contain
the values of the current pixel and all of it's neighbors, and these are the
arrays that'll be sorted by the sorting algorithm to be able to take the median
value.
#define filterWidth 3
#define filterHeight 3
#define imageWidth 320
#define imageHeight 240

//image buffers
ColorRGB image[imageWidth][imageHeight];
ColorRGB result[imageWidth][imageHeight];

//color arrays
int red[filterWidth * filterHeight];
int green[filterWidth * filterHeight];
int blue[filterWidth * filterHeight];

void combsort(int * data, int amount);
The main function applies the filter, calculates the medians and then draws the
result.
int main(int argc, char *argv[])
{
    //set up the screen
    screen(imageWidth, imageHeight, 0, "Median Filter");

    //load the image into the buffer
    loadBMP("pics/noise.bmp", image[0], imageWidth , imageHeight);

    //apply the filter
    for(int x = 0; x < w; x++)
    for(int y = 0; y < h; y++)
    {
        int n = 0;
        //set the color values in the arrays
        for(int filterX = 0; filterX < filterWidth; filterX++)
        for(int filterY = 0; filterY < filterHeight; filterY++)
        {
            int imageX = (x - filterWidth / 2 + filterX + w) % w;
            int imageY = (y - filterHeight / 2 + filterY + h) % h;
            red[n] = image[imageX][imageY].r;
            green[n] = image[imageX][imageY].g;
            blue[n] = image[imageX][imageY].b;
            n++;
        }

        combsort(red, filterWidth * filterHeight);
        combsort(green, filterWidth * filterHeight);
        combsort(blue, filterWidth * filterHeight);

        //take the median, if the length of the array is even, take the average of both center values
        if((filterWidth * filterHeight) % 2 == 1)
        {
            result[x][y].r = red[filterWidth * filterHeight / 2];
            result[x][y].g = green[filterWidth * filterHeight / 2];
            result[x][y].b = blue[filterWidth * filterHeight / 2];
        }
        else if(filterWidth >= 2)
        {
            result[x][y].r = (red[filterWidth * filterHeight / 2] + red[filterWidth * filterHeight / 2 + 1]) / 2;
            result[x][y].g = (green[filterWidth * filterHeight / 2] + green[filterWidth * filterHeight / 2 + 1]) / 2;
            result[x][y].b = (blue[filterWidth * filterHeight / 2] + blue[filterWidth * filterHeight / 2 + 1]) / 2;
        }
    }

    //draw the result buffer to the screen
    for(int x = 0; x < w; x++)
    for(int y = 0; y < h; y++)
    {
        pset(x, y, result[x][y]);
    }

    //redraw & sleep
    redraw();
    sleep();
}
The combsort function sorts the arrays of color values. The array contains the
value of every color in the rectangular area you're working on, but it's not
sorted so you can't immediatly take the median of it. This sorting algorithm
orders it from low to high, so that you know that the center value of the sorted
array will be the median. Combsort is a modified version of bubblesort, that
uses a gap starting at the size of the array and shrinking by 1.3 each step,
this was found to be the optimal shrink value. Setting gap to 11 if it's 9 or 10
also makes it faster. This quickly eliminates "turtles", which are low values at
the sides, known to make bubble sort slow. Finally, when gap is 1, it acts like
a normal bubble sort, but will go very fast because most turtles are gone. It's
not as fast as quicksort, but close, and much simpler to write.
//combsort: bubble sort made faster by using gaps to eliminate turtles
void combsort(int * data, int amount)
{
    int gap = amount;
    bool swapped = false;
    while(gap > 1 || swapped)
    {
        //shrink factor 1.3
        gap = (gap * 10) / 13;
        if(gap == 9 || gap == 10) gap = 11;
        if (gap < 1) gap = 1;
        swapped = false;
        for (int i = 0; i < amount - gap; i++)
        {
            int j = i + gap;
            if (data[i] > data[j])
            {
                data[i] += data[j];
                data[j] = data[i] - data[j];
                data[i] -= data[j];
                swapped = true;
            }
        }
    }
}
Here's again the noisy image:
The 3x3 median filter removes it's noise:
Higher sizes of filters go pretty slow, because the code is very unoptimized.
Their results are somewhat artistic though. Here is the result of different
sizes:
5x5:
9x9:
15x15:
Conclusion
This article contained code to apply convolution filters on images, and showed a
few different filters and their result. These are only the very basics of image
filtering, with bigger filters and a lot of tweaking you can get much better
filters.
The Fourier Transform article shows a different way to filter images, in the
frequency domain. There Low Pass, High Pass and Band Pass filters are discussed.